Solo Home Gel Manicure Kit
Whilst I adore all things beauty and lifestyle related, nails will almost hold a special place in my heart! As a qualified Nail Professional and salon owner, I’ve always been rather concerned about home gel manicure kits. I’ve seen from many popular “supermarket” home gel manicure kits, the damage that has resulted from untrained and rough application and removal of the gel, so I was a little skeptical when I received the SOLO One-Step Gel home manicure kit for review. However, I needn’t have been. Other than a couple of the tools that could do with a little refining, this is a great little kit. I’ve used it a few times applying and removing and each time it has lasted really well (between 7 and 12 days – 7 days being due to me repeatedly using cleaning products without gloves) and has caused no damage or any issues with my nails. 🙂
WHAT’S IN THE SOLO HOME GEL MANICURE KIT?
Contained within the kit is everything that you need to do your own solo home gel manicure including removal. The contents are:
- SOLO LED light
- 4 colours – Chicks Dig Firefighters, Pinkie Swear, 3s A Crowd, Truth Or Dare.
- Double Ended Cuticle Pushie tool and removal tool.
- Nail Prep Wipes
- Buffing Block
- 10 Removal Wraps
- Remover
How To Apply Solo Home Gel Manicure Kit
To be honest, it couldn’t really be simpler to apply your Solo Home Gel Manicure! Everything you need is supplied in the kit and when you run out of any items you can just reorder them (or new colours!) from Solo Gel UK. Theres a video at the top of this blog if you want to get a better look at the kit and how to apply but I’ll give you a quick explanation:
- Ensure hands are freshly washed and dried.
 Shape your nail using a 240 grit nail file. Very gently push back cuticles with the Cuticle Pushie tool.
- Instructions with the kit advise to buff the surface of the nail with the buffing block but I never do this. Ideally always try to avoid buffing the surface of your nails.
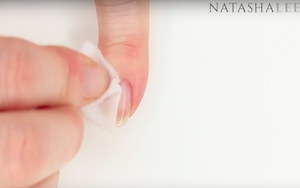
 Cleanse the nails with the Nail Prep Wipes paying special attention to the sides and end of the nail and under the free edge (the white bit of your nail).
- Apply a coat of Solo One-Step Gel carefully avoiding the skin around the nail and ideally leaving a gap between the polish and the skin of about 1mm. This will give a professional look to your nails and help them to last longer.

- Cure 4 fingers in your Solo LED lamp for 60 seconds. It will switch off automatically after 60 seconds. The thumb will require curing separately.
- Repeat stages 5 & 6.
- Finished!!! It’s as easy as that, no base coat, no top coat and no sticky layer to be removed.
Solo Home Gel Manicure Review
I have to say, despite having some strong reservations about this product on receipt, once I tried it I was incredibly impressed. Everything you need is in the kit and it’s so compact that it would barely take up any space in a makeup drawer but the lamp is actually pretty enough to be left on your dressing table! It’s also a really good price at £89.95. This would make the perfect Christmas present for anyone who loves painting their own nails and anything nail art related! In fact, before I became a professional (and consequently have an office and a salon full of nail stuff!), I’d have adored this kit, it would have made my Christmas! There are plenty of colours to purchase in addition to the kit and they are incredibly reasonable priced at only £12.95 each. My only comment on the kit would be that the filing block is a little too rough for natural nails, although it’s perfect for buffing the polish during removal and that whilst the Cuticle Pushie is beautiful, it’s very effective so go gently with it to avoid scratching the surface of your nails. Removal is easy, just use the products provided in the kit and follow the instructions on my video above. The removal really is a pleasant surprise as I’ve had to try and deal with removal of another brand of home gel polish in the salon on a new client and it was a nightmare! Just remember, if your nails do chip, NEVER peel any gel polish off as that can damage the nails and thin them, instead just remove with foil wraps and acetone. Have fun! xNx
Score 8⁄10 Highly Recommended
*Press Sample


