Before I was a trained professional, I used to spend hours painting my own nails at home, but I could never make them look like a professional manicure. There was streaky polish all over my skin and around my nails and I longed to learn how to paint my nails neatly. This has to have been one of my most requested tutorials, particularly by clients who purchase their CND Vinylux from me and want to know how to apply it nicely themselves at home.
Paint Your Nails Like A Pro
If you want to be able to paint your nails like a pro at home, then here is a lovely easy technique to follow. I’ve also included some easy cuticle work to get that really polished finish.
Tools You Will Need
- Finger soak manicure bowl
- Nail art brush for tidying (optional)
- Cuticle Nippers
- Plastic Backed Pads or Lint Free Pads
- Orangewood Sticks
- Nail Polish including Base & Top Coat
Perform A Manicure
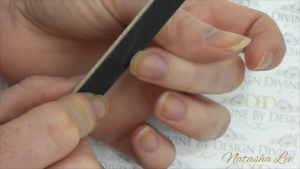 Ensure your hands and nails are clean and free from product. Using a 240 grit file (or finer) refine the length and shape of your nails. Brush or clean any nail dust residue from your nails and hands.
 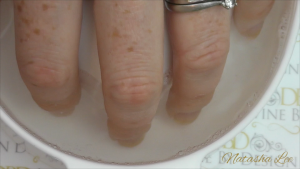 Fill a manicure bowl with a little hand soap and some warm water and soak your nails for 2 to 3 mins. After soaking your nails you are ready to begin your cuticle work. A common misnomer is that the ridge of skin around the base of your nail is your cuticle, it’s not, it’s your eponychium and that is living tissue that forms a seal to protect the area where your nails grows, known as the matrix. The eponychium should never be cut or forced back as this can result in infection and permanent damage to your nail growth as well as tissue scarring.
  Your cuticles however, are the non-living tissue aka skin, that sticks to the surface of your nail as it grows out and can be safely removed for a professional looking manicure, if done appropriately and gently. Whilst your nails and skin are still damp, take the wedge end of your orange wood stick and VERY gently remove your cuticle from your nail plate by gently rubbing it free. If you want to be really gentle, then wrap a little cotton wool round the end of the orange wood stick before removing the cuticles.
 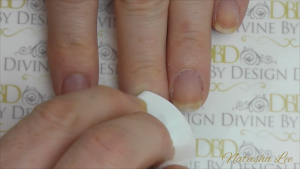 Once you have released the cuticle from your natural nail, take a plastic backed pad dampened with pure acetone or an oil-free acetone polish remover, and clean all over the surface of the nail and under your free edge (the white bit of you nail). Avoid touching your nails with your hands/face after cleansing with the pad as you can transfer oil and germs onto your nail which can affect how long your nails polish lasts. Now you are ready to paint your nails like a pro! 🙂
Paint Your Nails Like a Pro
Make sure you are at a table or desk so that you can lean both hands on the surface for maximum control. If you are using a traditional polish you need to apply a base coat, this needs to be a thin layer and to make it last you will need to “cap” the end of your nail which you can do by running the brush lightly along the edge of the nail tip. Ensure that you keep all product off the skin using the same brush and portion method I will now describe for applying your colour coat. Take your bottle of polish and give it a good shake to really mix up the solids and solvents to get a good even application.
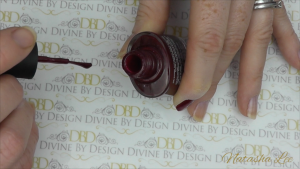 Unscrew the lid and as you remove it wipe the stem of the brush on the neck of the bottle to remove excess polish and prevent pooling. As you draw the bristle end of the brush from the bottle, push one side of the bristles against the neck of the bottle to leave a nice portion of polish on the underside of the brush only.
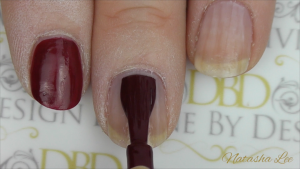 Apply the side of the brush with the polish on, to the centre of your nail, about 1-2mm away from the skin at the base of the nail. Apply a small amount of pressure to spread the brush over the nail then push the brush gently towards the cuticle/eponychium area leaving a tiny gap between the polish and your skin. Then pull the brush down the nail to the nail tip.
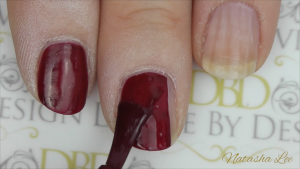 Apply the brush at the left side of where your first polish stroke starts, and slowly sweep in an arch down the left side of the nail making sure the polish doesn’t touch the skin. It’s better to paint slowly as you have more control and it will save you time in correcting mistakes after.
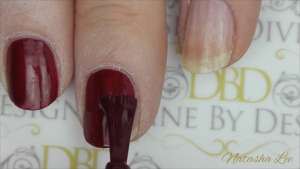 Repeat this step on the right side of the nail, if you don’t have enough polish left on the underside of the brush, turn it over and then start painting 😉 Paint all 10 nails using this method and then go straight into applying your second coat in exactly the same way. On your second coat you can be a bit quicker as if you have applied your polish neatly on your first coat, you can use that as a guide.
 If you make a mistake and polish goes onto the skin then don’t panic, just correct it as it happens. If you are a little unsteady with your hands, then just dampen a plastic back pad with some acetone or acetone based polish remover, and wipe a square nail art brush on it. Then clean the area off with the brush. If you feel more confident, then dampen a plastic backed pad with acetone or polish remover, and carefully, with the pad on it’s edge and the plastic side facing the nail, sweep the excess polish away without marking the nail.
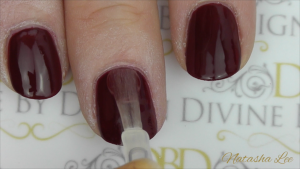 Now you are ready to top coat, using the same polish portion control as with the colour coat, allow a little more top coat on your brush to avoid dragging the colour off with your top coat brush. Keep a nice healthy amount of top coat on your brush so that you don’t end up with bare patches on the nail. Apply down the centre and each side as you do with the colour and “cap” the end of the nail to prevent chipping.
 Once your top coat has dried, apply cuticle oil to the skin around the nail and gently massage in.
 CONGRATULATIONS!!! You have just learnt how to Paint Your Nails Like A Pro. Remember that practise makes perfect, a couple of tries and you will be amazed at how neatly and beautifully you can apply your polish! If you want to watch a step by step tutorial on how to do it, please see below. Happy painting beautiful people! xNx


