Negative Space Nail Art with Glitter & Crystals – I’ve had a nice little stash of nail vinyls for a while and I’ve been waiting for a chance to use them. My inspiration finally came in the form of the discontinued Essie nail polish colour “Starry Starry Night”. It was such a pretty colour and I realised that 2 of my existing Essie nail polish colours looked so beautifully similar that they would make a lovely combination with some negative space nail art.
NEGATIVE SPACE NAIL ART PRODUCTS/TOOLS
You can use any colours and tools that you already have, but if you are wanting to recreate my design exactly, then below I have included a list of the products which if you click on them, will take you to where you can buy them. xx
CND STICKEY BASE COAT
ESSIE “SILVER BULLIONS”
BARRY M “SILVER FOIL EFFECT”
CND VINYLUX SEASIDE PARTY
ESSIE ARUBA BLUE
SECHE VITE TOP COAT
NAIL VINYLS
CRYSTAL KATANA
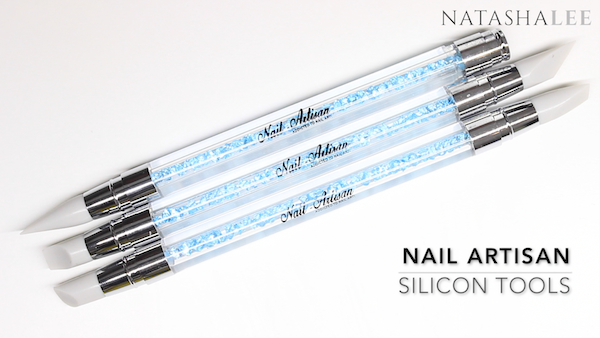
CRYSTAL SILICONE NAIL ART TOOLS
NAILSINC VITAMIN E OIL PEN
NEGATIVE SPACE NAIL ART METHOD
 As always, begin by filing and performing cuticle work on your nails followed by cleansing the nails ready to apply base coat. If you need help on how to do this, then visit my blog post here.
 Once you have applied base coat to all 10 nails and it’s dried, you are ready to go in with your base colour which is Essie’s Silver Bullions. Apply to all 10 nails and allow to dry completely (it’s very important that the polish is dry completely before applying vinyls so just apply a thin coat of Silver Bullions)
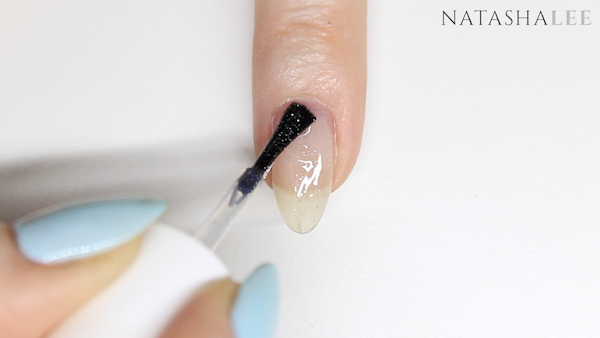
 Using a chevron/right angle nail vinyl, apply to the nail using a pair of tweezers. Face the point towards the tip of the nail about 1 third of the way up the nail from the cuticle area. The area from the cuticle up to the nail vinyl will form the part of the negative space nail art. Ensure the strips of the vinyl are securely adhered to the nail and tucked into the side walls using either a silicone nail tool or your finger. It is probably easiest to apply to one hand at a time!

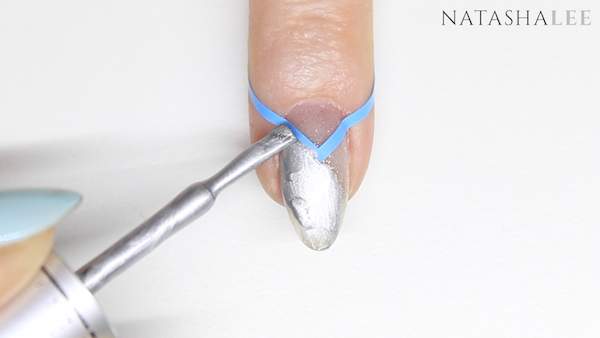
 Using a silver chrome nail polish like Barry M Silver Foil Effect, apply the polish from the nail vinyl to the tip of the nail. It will only take one even coat. Carefully remove the nail vinyl with tweezers. It’s best to start by removing one side of the vinyl up until the point, and then remove the other side and carefully detach from the nail. Allow the silver polish to dry completely.

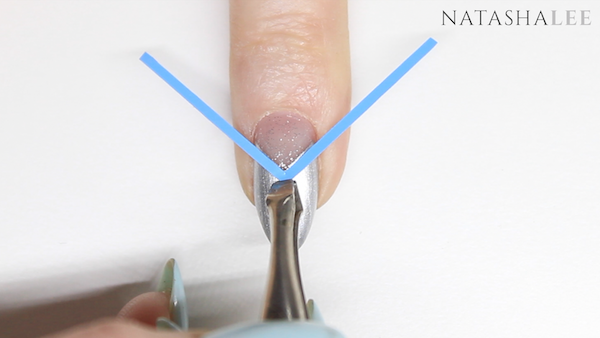 Apply another nail vinyl in line with the silver polish so that the vinyl just covers the start of the silver polish. Apply to all 10 nails in the same way in which you applied the first set of vinyls (but again it’s best to probably do one hand at a time).
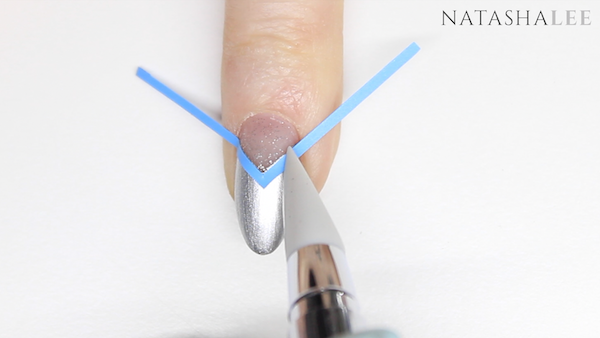
- I adore the colour I’ll be using for the final design which is Essie’s Aruba Blue, however, the polish is rather thin and therefore you can chose to either apply 3-4 coats for a fully opaque coverage (which is time consuming waiting for it to dry) or you can apply a deep blue first, which I did. I used CND Vinylux in Seaside Party. Apply from the nail vinyl to the tip of the nail.

 Follow with a coat of Essie’s Aruba Blue for a beautiful shimmer over all of the nails. Your negative space nail art is almost finished!
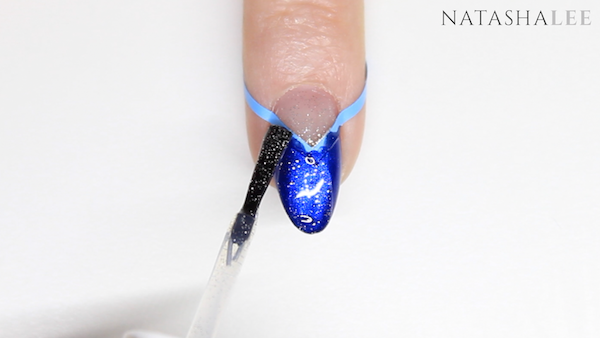 Add a coat of Essie’s Silver Bullion over your Aruba Blue. Carefully remove your applied nail vinyls to avoid tearing your polish.
 Once your nail vinyls are removed you may have a little ledge left from the layers of polish. Using a flat ended silicone tool, gently push down on any ledge in the polish. Use a straight edge silicone tool to tuck any polish it that isn’t sitting straight.
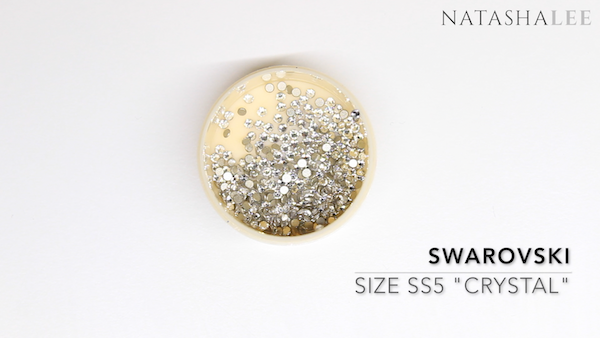 You are now on the final steps of your negative space nail art. For the final stage I used Swarovski SS5 flat backed non-hotfix “Crystal“, a Crystal Katana and Seche Vite Top Coat. Apply the Seche Vite top coat one nail art a time.

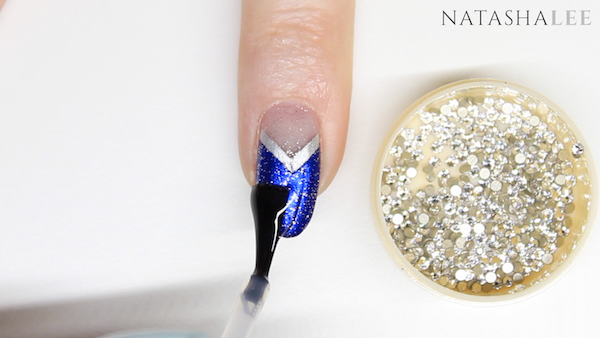 Once you’ve applied your top coat to one nail, use your Crystal Katana or preferred gem picked to pick up one of your Swarovski crystals/gems. Apply within the band of silver polish at the top of the point. Turn around your Crystal Katana and use the metal end to gently but firmly press your crystal into the top coat.
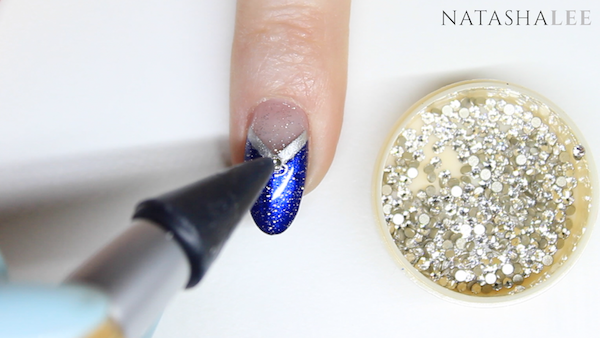

- Apply Swarovski crystals to all 10 nails and your negative space nail art is complete! The final look is stunning and is perfect if you are looking to create really amazing nail art suitable for weddings, proms, parties or just really want to turn heads! Although I’ve completed this nail art on long nails, this is a perfect look negative space nail art for short nails too!
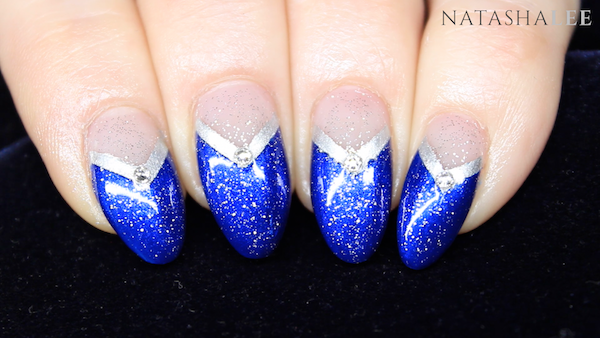
If you try this negative space nail art out then let me know how you get on by tagging me with the hashtag #NatashaLeeBlogger or find me on social media. My links are at the top right of the page.
Love & Ginger hugs
Tasha xxx
*contains affiliate links


