Matte Blue Nails With Crystals
Despite first creating this diamond crystal double sided mani almost 2 years ago, I think this design will forever be a favourite of mine as it’s just so stunning yet simple and the double-sided Swarovski crystals just look amazing. So, ok the diamonds on the underside are totally impractical day to day, but imagine these on prom, engagement or wedding photos for that super special occasion!
LUXE BLUE VELVET NAILS Step 1

After performing cuticle work and filing, cleanse the nail and then apply your base coat (if applicable for your system). Then go in with your first coat of colour. This amazing colour is actually a regular nail polish from Essie called Aruba Blue (UK / US ), but Magpie Colour have a perfect Gel Polish colour dupe called “Heidi Boo”. Allow to dry (or cure if using gel polish) then apply your second coat.
MATTE BLUE NAILS WITH CRYSTALS Step 2
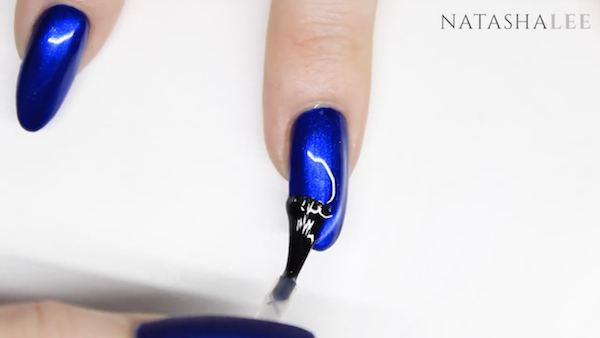
Apply a top coat ( UK / US ), this is to ensure that the finished design is hard wearing and not prone to service breakdown.
DARK BLUE CRYSTAL NAILS Step 3

Apply a matte top coat ( UK / US ). I have been known to use a regular polish matte topcoat over a gel polish but I wouldn’t recommend this with paying clients. A great option for you personally though if your preferred brand doesn’t offer a matte top coat.
MATTE BLUE NAILS WITH DIAMONDS Step 4
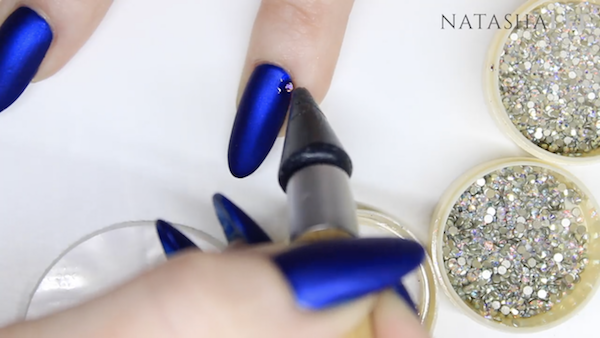
Begin applying crystals and caviar beads. I used Swarovski AB Crystal in SS3 ( UK / US) and SS5 (UK / US) and silver caviar beads (UK / US). If you are creating this look with regular nail polish then use top coat ( UK / US ) to apply the crystals, if however you are doing this with gel polish, I find it best to adhere crystals using a clear builder gel (UK / US) but a gel top coat will work also. The tool that I’m using to apply the crystals and caviar beads is a Crystal Katana (UK / US) by the Crystal Ninja.
MATTE BLUE NAILS WITH CRYSTALS Step 5
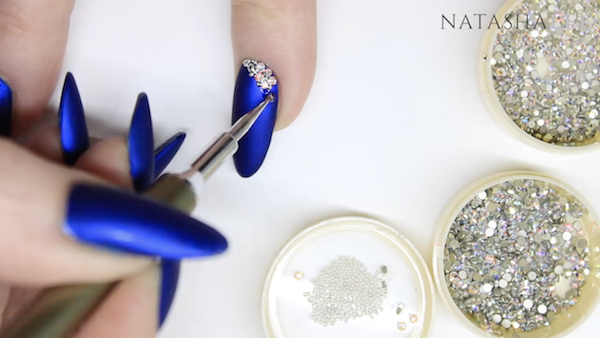
Build up your design by using larger crystals first, then fill in between with smaller crystals and caviar beads until you are happy with the look.
BLUE NAILS WITH CRYSTALS UNDERNEATH Step 6
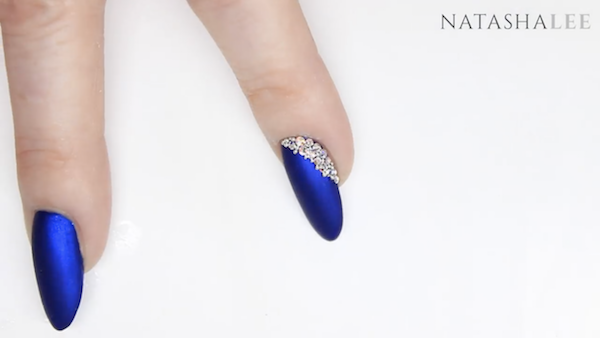
Your main design is finished and you could just leave it here for a stunning look. However, if you are all about the extra, then it’s time to add some extra bling!
BLUE VELVET NAILS WITH CRYSTALS Step 7
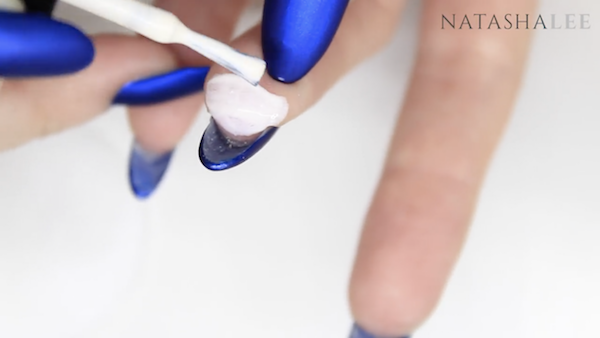
After cleansing under the nails, apply a nail barrier or liquid latex (UK / US) to protect the finger tip (optional if you work carefully) and apply a base coat.
DARK BLUE & SILVER NAILS WITH DIAMONDS Step 8
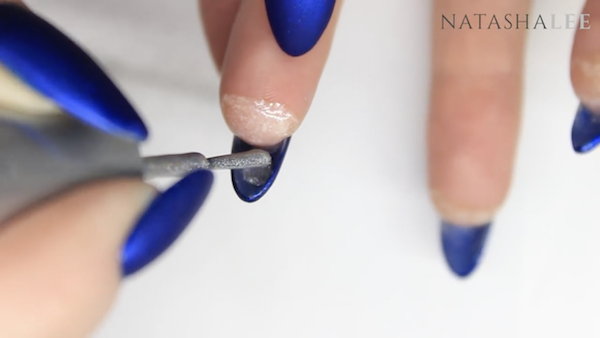
Apply a sparkly silver to the underside of the nail (UK / US).
MATTE BLUE NAILS WITH CRYSTALS Step 9

Using either Top Coat or Builder gel again, adhere crystals to the underside of the nail. You may need to use only the smaller SS3 ( UK / US) and caviar beads (UK / US) for this stage to keep it looking even and neat.
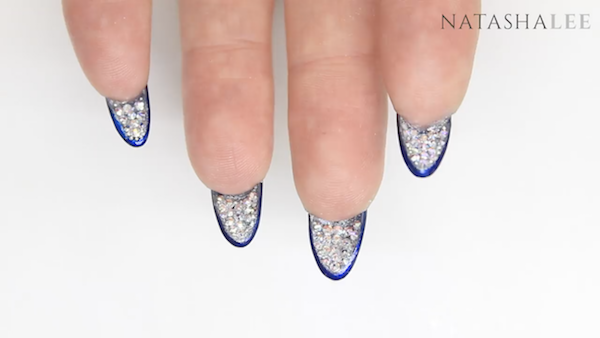

Your beautiful look is finished!! If you wanted to wear the crystals on the underside temporarily but keep the main design, then if you use a peel off base coat like Ünt (UK / US) on the underside, they last for a few days but can easily be removed by using an orange wood stick to peel them off.

– contains affiliate links


